Sharing Beacon Projects With Other Users
Beacon cloud projects can be shared with other Beacon users.
Getting Started
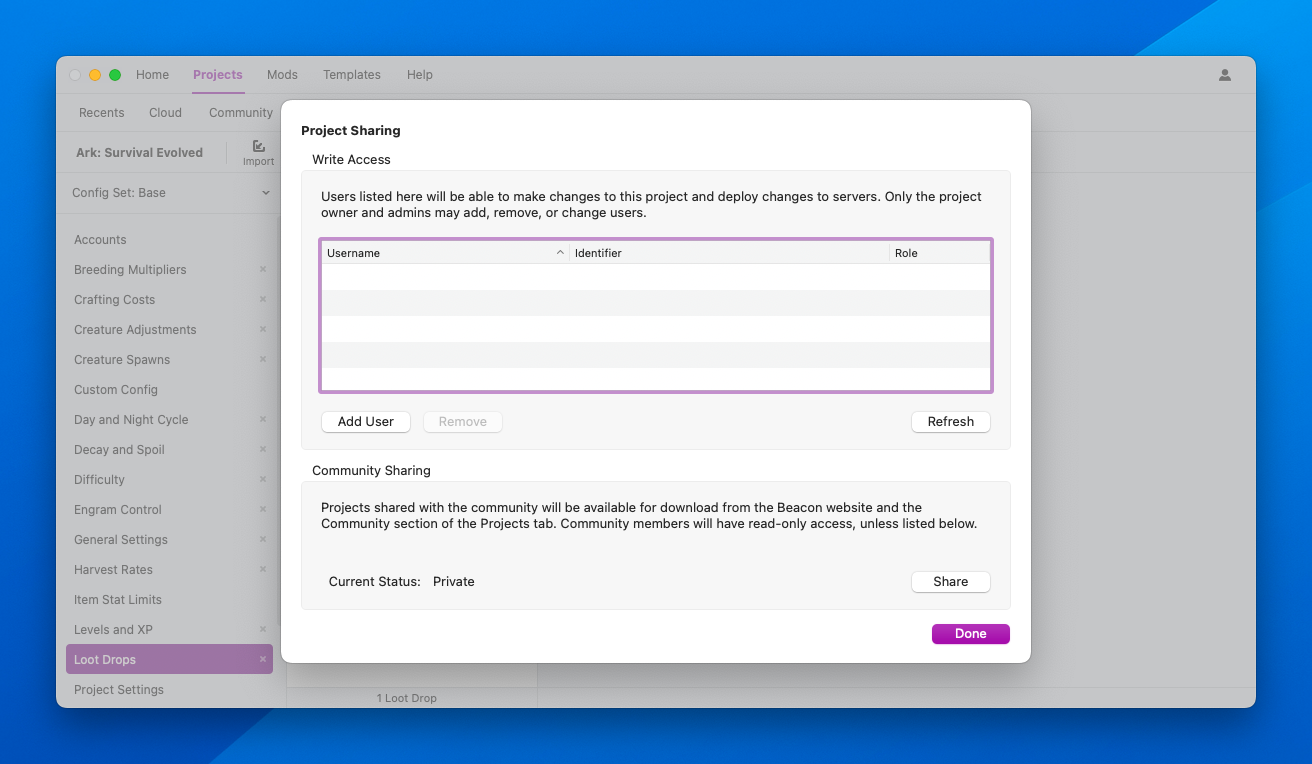
Open the Project Sharing panel using the Share button in the toolbar of an opened cloud project.
Sharing With Specific Users
For teams of admins, sharing a single project can make life much easier. Projects shared in this manner contain all the encrypted data and linked servers. This means a head admin could share the project with sub-admins who would have the ability to restart the server without the head admin giving out their hosting account information.
Each added user can have one of three permissions assigned:
- Guest: Guest users can view the project, but cannot save changes, nor can they copy config data, export, or deploy. This permission is most useful for coders. The project can be shared with the client with guest permissions, allow them to review the work before payment, without the risk of the client taking the project and not paying.
- Editor: Editor users can make changes, save the project, export, and deploy. They cannot add, remove, or change project users.
- Admins: Admin users have all the permissions of Editor users, as well as the ability to add, remove, and change project users. Admin users may not add or remove other Admin users.
The Owner Role
A project cannot have more than one owner. The owner is the only user able to add or remove admins.
There are three ways to add a user to a project:
Add By Email Address
Press the Add User button and enter the email address of the user’s Beacon account. This does not email the user a link and the user’s account must already exist.

Add By User Identifier
Adding a user by their identifier is accurate and does not require the user to have a Beacon account, though their Cloud and Community features must be enabled.
First, the user must choose Show Account Info from the user menu with icon in the top right corner of Beacon’s window.
Inside the User Info panel is the User ID field. The full value of that field is needed to add the user.

Warning
The value in the Private Key area should never be shared with anybody. Ever. Not even Beacon tech support. Seriously.
Once you have the identifier of the desired user, press Add User and enter the identifier. This is best done with copy and paste.
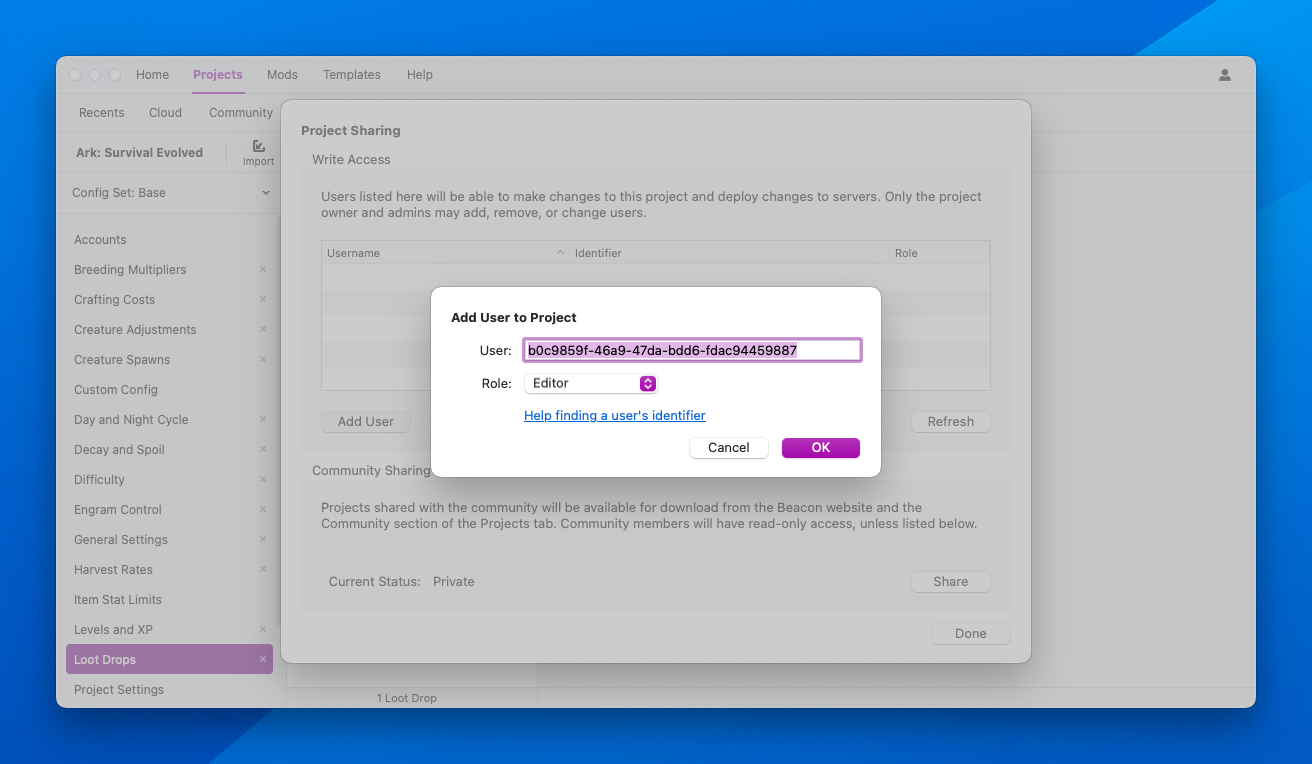
If there is an error, check the identifier. If the identifier is correct, that means the user has their Cloud and Community features turned off. The user should open use the user menu again and choose the Enable Cloud & Community option. Once that is done, try adding the user again.
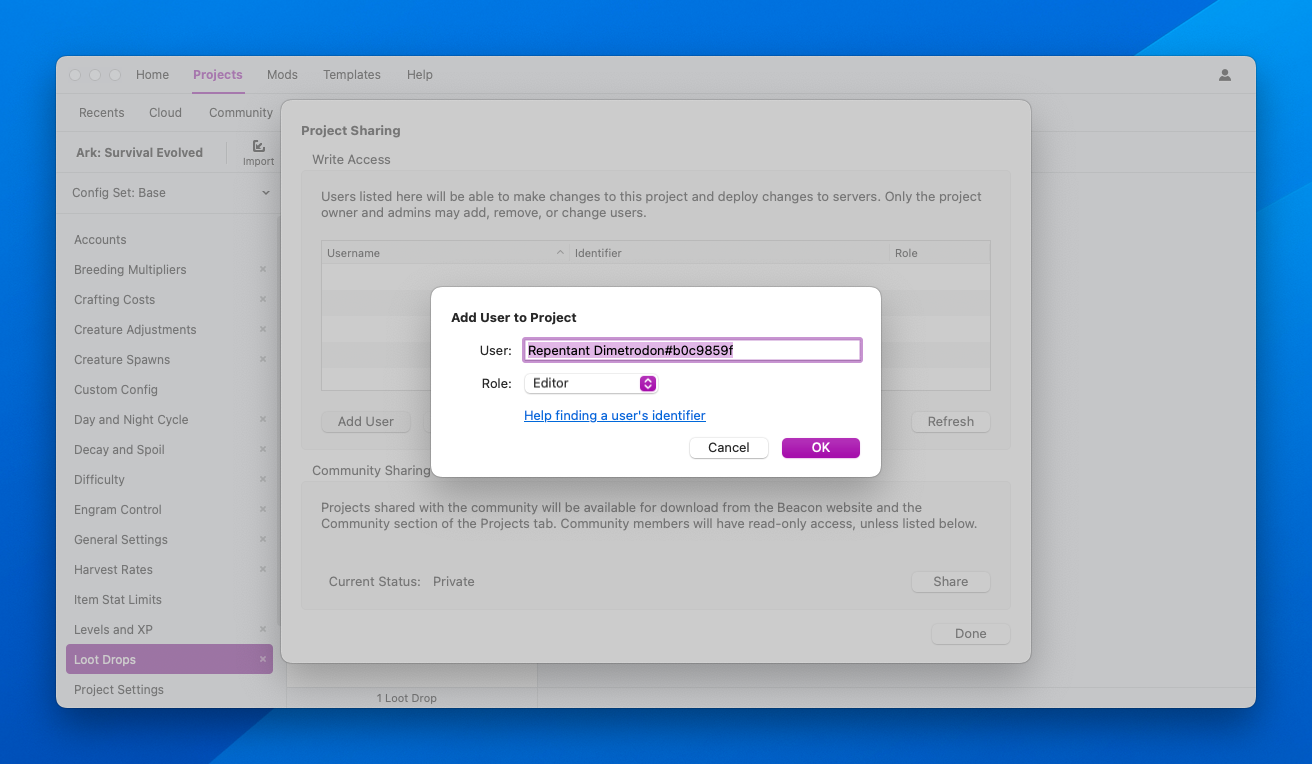
Add Via Username
Adding a user by their username must be done with the full username, which includes an 8-character identifier after their name. The easiest way to find the correct value to enter is on the user’s control panel. The username with identifier tag will be shown at the top of the user’s control panel.

Press the Add User button and enter the value to continue.
After Adding a User
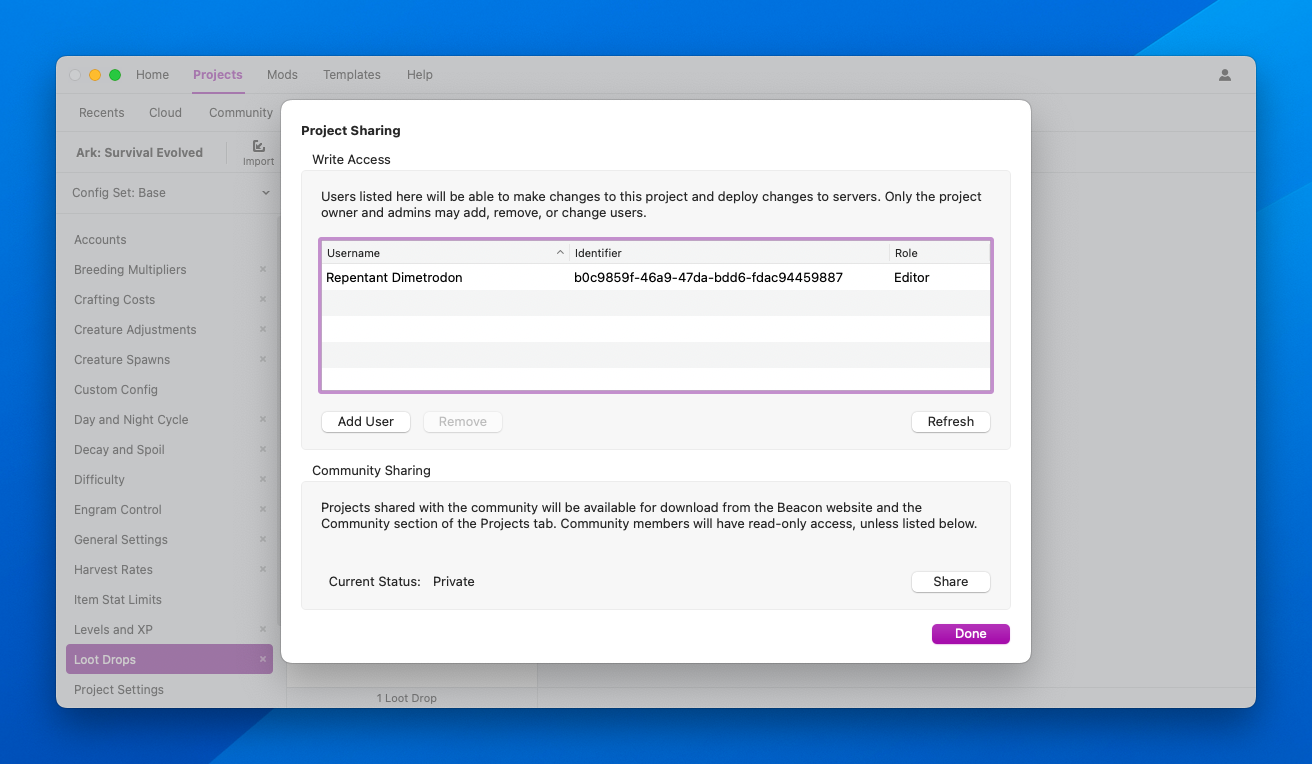
Once a user has been added to the project, they will appear in the user list. Changes made here, including permission changes, are immediate. For example, upgrading a user from Guest to Editor permissions will not require the user to reload the project.
One at a time, please
Be careful to avoid multiple users editing the project at once. If User A saves the project while User B is still working on it, when User B saves the project, User A’s changes would be reset. Beacon is unable to merge changes made by users. Because of this, Beacon will warn you if another user makes changes while you have a project open.
Sharing to the Community
The lower section is used for sharing the project with the Community tab in Beacon’s Projects view and on the Browse Community Projects section of the website.
To request your project be shared to the community, just click the Share button. Sharing requests require approval. To increase the chances of approval, make sure your project has a good unique description in your projects’s Project Settings editor. Duplicated (or very similar) descriptions will not be approved.
If your project is approved, you may stop sharing at any time using the same button, which will be labelled Unshare instead.
Private project data will not be available to other users.