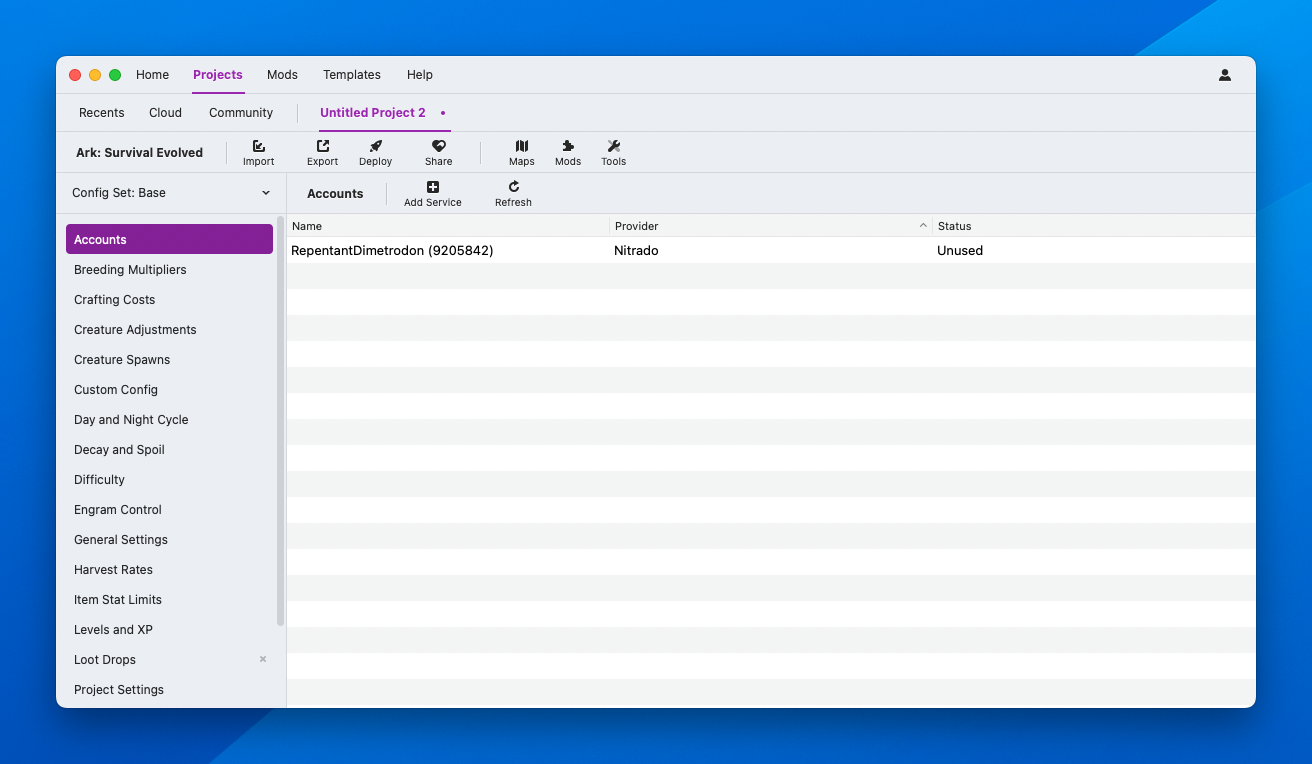
The Accounts Editor
This editor is compatible with Ark: Survival Ascended, Ark: Survival Evolved, and 7 Days to Die projects.
The Accounts editor allows you to control which of your connected services are part of your project for use with import, deploying, and server control.
Importing Into New Projects
Creating a new project and pressing the Import button in the project toolbar will automatically find servers on every connected service on your account. Choosing to import servers from a service will automatically add the service to your project.
Connecting Your First Service
At the top of the Accounts editor is the Add Service button. When you click the button, Beacon will check with your account to see if there are any services connected to your account. If there is not, or all the services have already been added to your project, you’ll be asked instructed to go to the website to connect an external service with your account.

Tip
While this feature does not require a Beacon account, having one is strongly recommended.
Press Connect to be taken to the Beacon website to begin connecting external services.

Below each service provider logo will be Connect and Add Token buttons, depending on the features supported by the service provider. You do not need to use both options even if a service provider offers both. The Connect option is easier and should be used when available.
Add Token
Clicking the Add Token will show a window to add a “long life token” to your Beacon account.
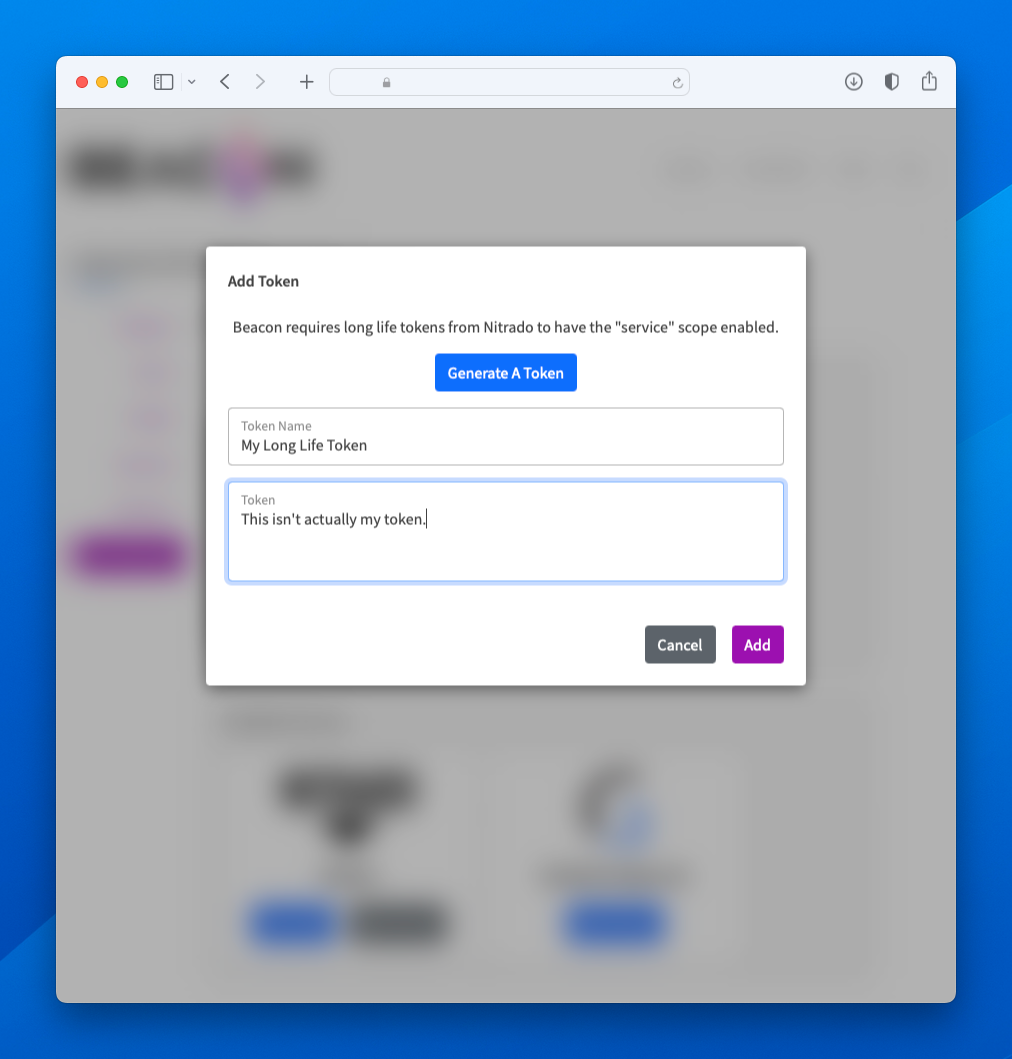
At the top of the window will be instructions. Pay attention to these instrutions, as failure to follow them may result in a token that is not usable. The Token Name field allows giving this token a name used for organization, but will have no impact on how the service is used. The Generate Token button will take you to the service provider’s website where you can generate the token, but you will need to follow their instructions.
Once you have generated a token, paste it into the Token field and press the Add button.
Your Connected Services
Now that a service has been connected, it will appear in the Connected Services section. A service can be removed using the Disconnect or Discard buttons, depending on how the service was added.

Adding Your Service to Your Project
Now that you have a service connected to your account, you’re ready to add it to your project. Return to Beacon and press the Add Service button again. This time, your service can be selected from a menu.
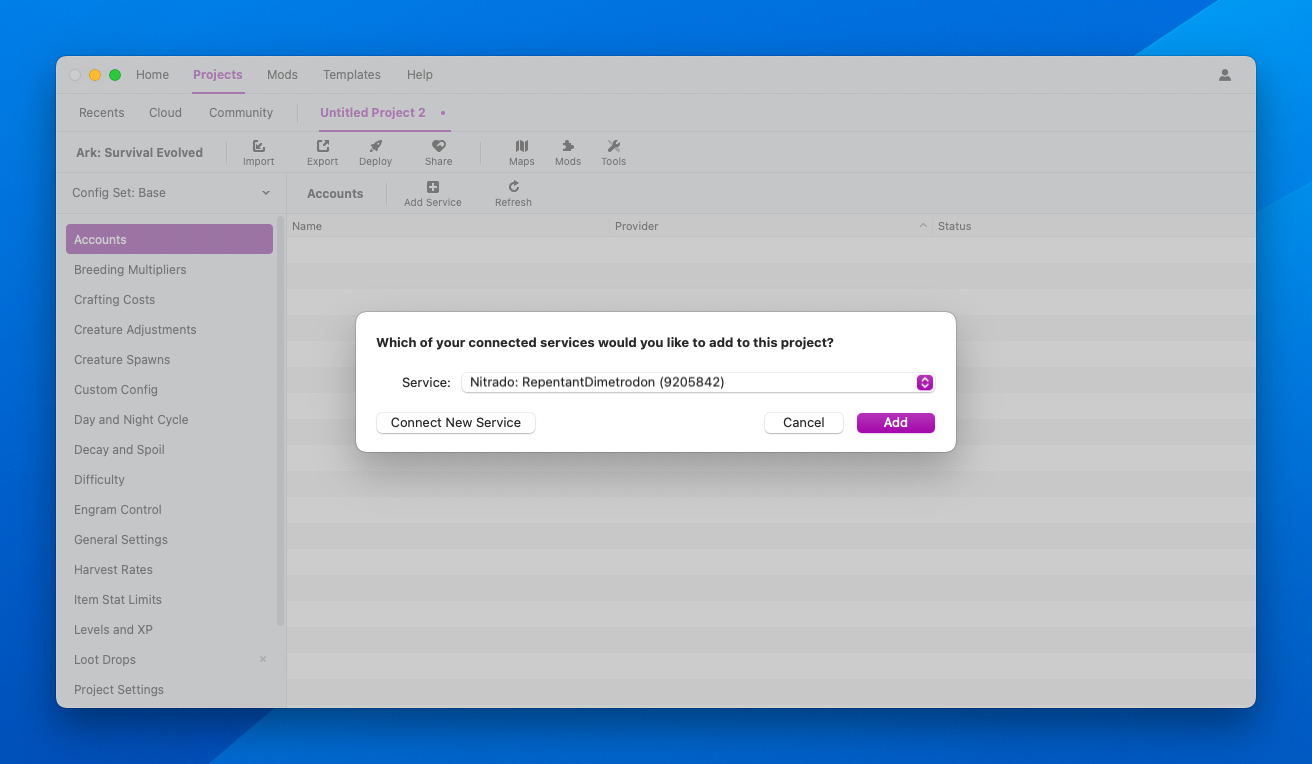
Press the Add button, and the service will be available to your project to use for importing, deploying, and server control.